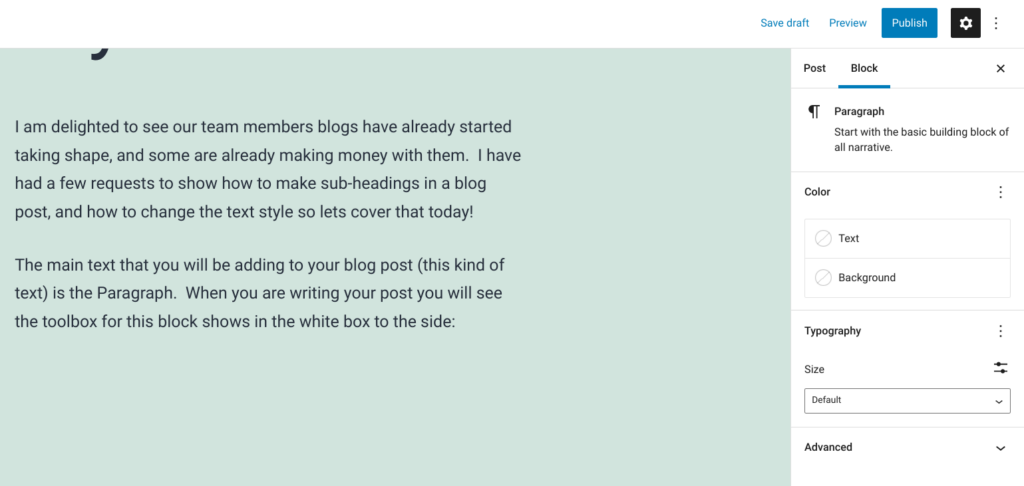
I am delighted to see our team members blogs have already started taking shape, and some are already making money with them. I have had a few requests to show how to make sub-headings in a blog post, and how to change the text appearance so lets cover that today!
The main text that you will be adding to your blog post (this kind of text) is the Paragraph. When you are writing your post you will see the toolbox for this block shows in the white box to the side:
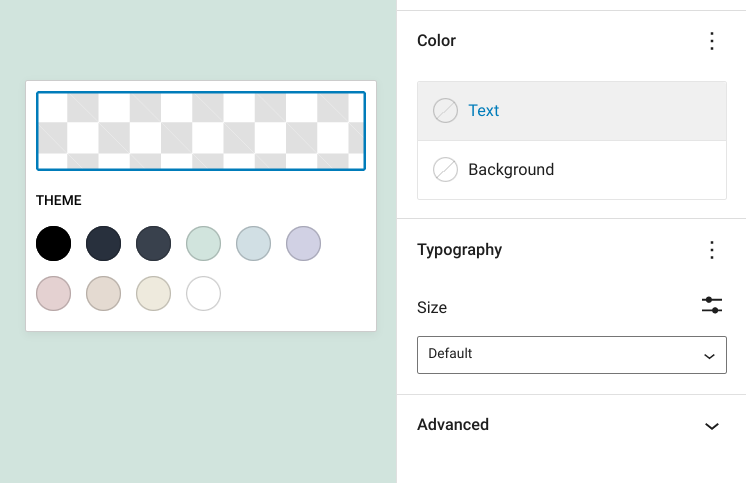
The Paragraph is the default setting which will automatically be used as soon as you start to type. If you want to you can do things like this with the Paragraph toolbox:
Change the text to red
Highlight certain parts of the text to show it is important with a coloured background.
Change the size of a specific sentence to much larger
Or make it much smaller
You can also use a simple bold text or underline or indeed write in italics if you want to.
Using The Paragraph Toolbox
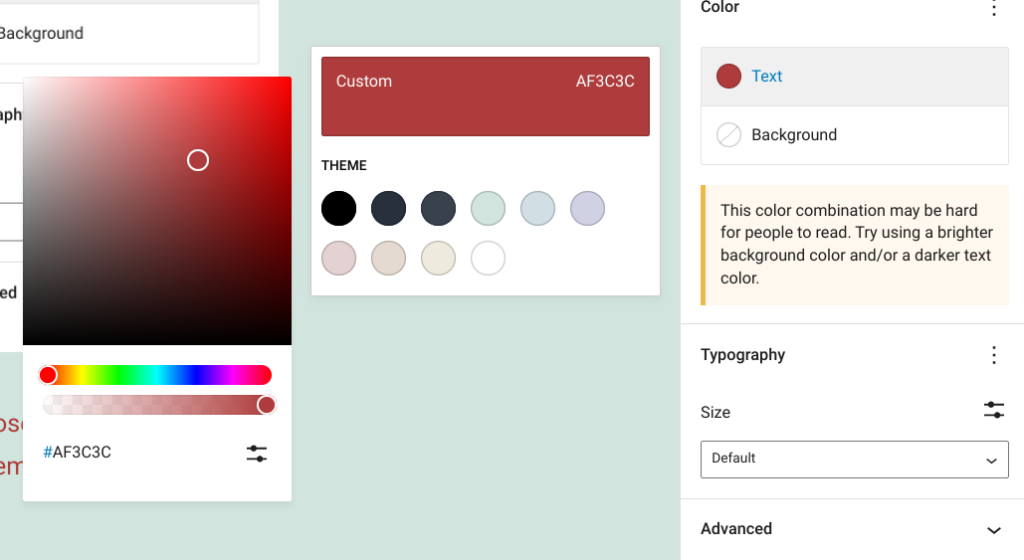
To use the toolbox you simply click on the option you want to change. So I I want to change the colour of the text I click on the Text button and a new pop up box will appear with the colours related to the theme you have chosen will appear:
If you want to use a different colour than those provided in the theme click on the chequerboard box above the theme colours and you can choose any colour you wish (just chose the main colour from the rainbow line under the box and move the white circle picker from the top corner to the shade you want).
The background colour tool box works in exactly the same way:
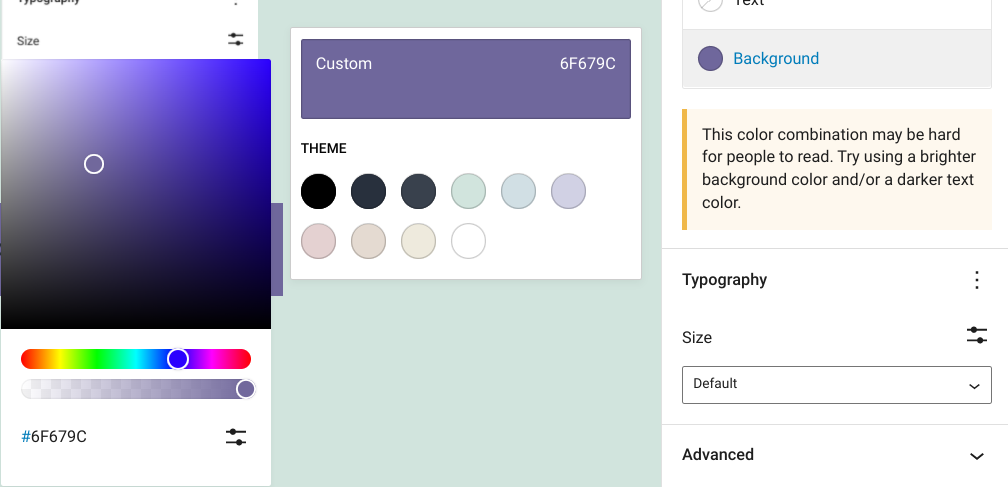
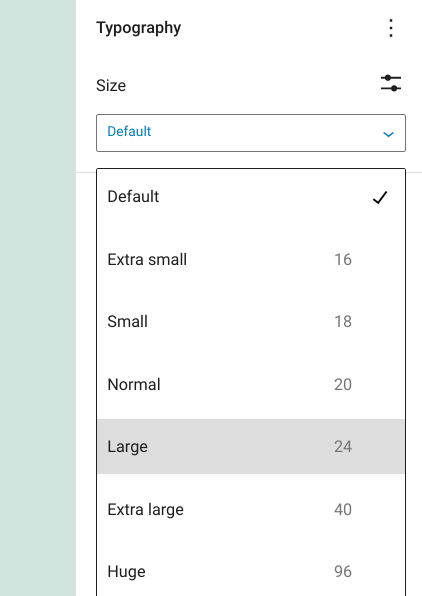
To change the size of the text you use the Typography tool box and choose from the dropdown options:
Shortcut Commands
To use the bold, underline or italics you just need to highlight the text you want to change first and use the following shortcut commands:
ctrl + B = Bold
ctrl + U = Underline
ctrl + i = Italics
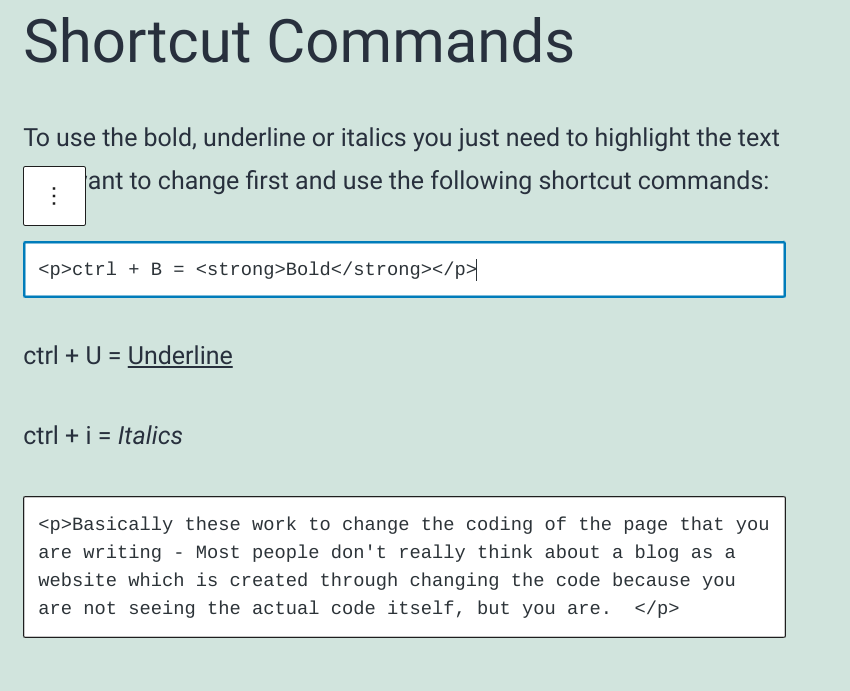
Basically these work to change the coding of the page that you are writing – Most people don’t really think about a blog as a website which is created through writing and changing the code because you are not seeing the actual code itself, but you are.
Those of us who are used to editing and designing web pages learn to write the actual code which you can see in this image:
As you are actually changing the coding of your blog page with your edits this means it is possible to do pretty much anything you want to with a blog post….. you just need to understand the code and how to change it. The shortcuts, or toolboxes provided by wordpress (and other web editors) are for those who don’t speak computer code languages like HTML, Javascript and CSS, but I think you should still understand that this is what you are doing when making edits to a blog post.
Sub Headings
Last edit for today, is the sub heading.
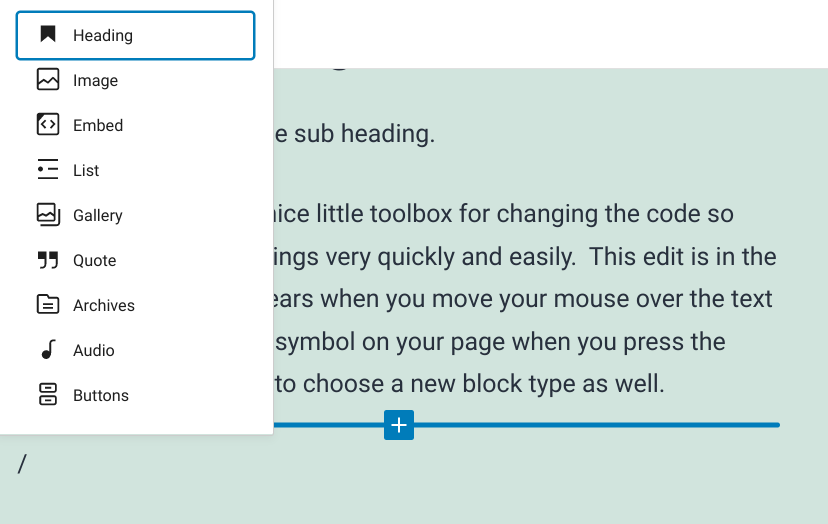
WordPress provides a nice little toolbox for changing the code so you can make subheadings very quickly and easily. This edit is in the block menu which appears when you move your mouse over the text you have added, as a + symbol on your page when you press the enter, or you can type / to choose a new block type as well.
The easiest of these in my opinion is the /:
Other Block Edits
As you can see in the image above using the / command will give you a list of common block edits, such as images, lists buttons etc.
I will look at these in more detail in another post.
For now have fun playing with the toolboxes which will change your text……
Ellie xx